- Registration form
- Example MATLAB and Python submissions and scoring code
- Submission instructions and form
- Leaderboard, results, and papers
- Public discussion forum
- Rules and deadlines
- Current and general FAQs
- About
Submission Instructions and Form
PhysioNet/CinC Challenge 2020: Cloud Submission Instructions
Table of contents
- Introduction
- Preparation and submission instructions
- MATLAB-specific instructions
- Python-specific instructions
- R-specific instructions
- Julia-specific instructions
- Docker-specific FAQs
- FAQ
- Submission form
Introduction
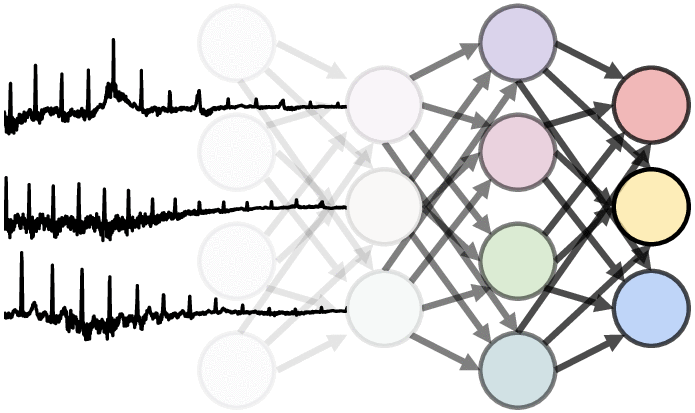
For the first time in a public competition, teams must submit both the code for their models and the code for training their models. To help, we have shared simple baseline models in Python and MATLAB, and we encourage teams to use our Python and MATLAB code as templates for their entries. To add the code for training your model to your entry, please edit the train_12ECG_classifier script, and to add the code for running your model to your entry, please edit the run_12ECG_classifier script. Please see the following sections for more detailed, language-specific instructions.
Preparation and submission instructions
- Create a private GitHub or Gitlab repository for your code. We recommend cloning our example code and replacing it with your code. Add
physionetchallengeshelperas a collaborator to your repository. - Add your classification code to your repository. Like the example code, your code must be in the root directory of the master branch.
- Do not anything that is not needed to create and run your classification code.
- Follow the instructions for the programming language of your submission.
- Use Google Forms to submit your entry. We will clone your repository using the HTTPS URL that ends in
.git. On GitHub, you can get this URL by clicking on “Clone or download” and copying and pasting the URL, e.g.,https://github.com/physionetchallenges/python-classifier-2020.git. Please see here for an example. - We will put the scores for successful entries on the leaderboard. The leaderboard will publicly show your team name, run time, and score.
MATLAB-specific instructions
- Confirm that your MATLAB code compiles and runs in MATLAB 2019b or MATLAB 2020a.
- Using our sample MATLAB classification code (link) as a template, format your code in the following way. Consider downloading this repository, replacing our code with your code, and adding the updated files to your repository.
- AUTHORS.txt, LICENSE.txt, README.md: Update as needed. Unfortunately, our submission system will be unable to read your README.
- train_12ECG_classifier.m: Update this script to create and save your model. It also performs all file input and model output. It takes the header with all the data and demographics information, a matrix of 12 leads ECG (columns are ECG leads and rows are time windows), and outputs your model (weights and any needed parameters). You can edit this script as much as you need.
- train_model.m: Do not edit this script. It calls your train_12ECG_classifier.m script. We will not use the train_model.m script from your repository, so any change made to this code will not be included.
- load_12ECG.model.m: Update this script to load your model weights and any parameters from files in your submission. It takes no input (place any filenames, etc. in the body of the function itself) and returns any output that you choose. You must implement this function in the load_12ECG_model.m script.
- run_12ECG_classifier.m: Update this script to run your model. It takes the header with all the data and demographics information, a matrix of 12 leads ECG (columns are ECG leads and rows are time windows), and the output from load_12ECG_model as input and returns a probability or confidence score and a binary classification for each class as output. You must implement this function in the run_12ECG_classifier.m script.
- driver.m: Do not change this script. It calls your load_12ECG_model function once, and it calls your run_12ECG_classifier function for each 12ECG recording. It also performs all file input and output. We will not use the driver.m script from your repository, so any change made to this code will not be included.
- Add your code to the root/base directory of the master branch of your repository.
- We will download your code, compile it using the MATLAB compiler: training (
mcc -m train_model.m -a .) and running (mcc -m driver.m -a .) your classifier, and run them on Google Cloud. - Here is a sample repository that you can use as a template: MATLAB classifier.
Python-specific instructions
- Using our sample Python classification code (link) as a template, format your code in the following way. Consider downloading this repository, replacing our code with your code, and adding the updated files to your repository.
- Dockerfile: Update to specify the version of Python that you are using on your machine. Add any additional packages that you need. Do not change the name or location of this file. The structure of this file is important, especially the 3 lines that are marked as Do Not Delete.
- requirements.txt: Add Python packages to be installed with pip. Specify the versions of these packages that you are using on your machine. Remove unnecessary packages, such as Matplotlib, that your classification code does not need.
- AUTHORS.txt, LICENSE.txt, README.md: Update as needed. Unfortunately, our submission system will be unable to read your README.
- run_12ECG_classifier.py: Update this script to load and run your model using the following functions.
- load_12ECG_model: Update this function to load your model weights and any parameters from files in your submission. It takes no input (place any filenames, etc. in the body of the function itself) and returns any output that you choose. You must implement this function in the run_12ECG_classifier.py script.
- run_12ECG_classifier: Update this function to run your model. It takes the header with all the data and demographics information, a matrix of 12 leads ECG (columns are ECG leads and rows are time windows), and the output from load_12ECG_model as input and returns a risk score and a binary classification for each class as output. You must implement this function in the run_12ECG_classifier.py script
- driver.py: Do not change this script. It calls your load_12ECG_model function only once and your run_12ECG_classifier function for each 12ECG recording. It also performs all file input and output. We will not use the driver.py script from your repository, so any change made to this code will not be included.
- Add your code to the root/base directory of the master branch of your repository.
- We will download your code, build a Docker container from your Dockerfile, and run it on Google Cloud.
- Here is a sample repository that you can use as a template: Python classifier.
Docker-specific FAQs
Why containers?
Containers allow you to define the environment that you think is best suited for your algorithm. For example, if you think your algorithm needs a specific version of CentOS, a certain version of a library, and specific frameworks, then you can use the containers to specify this. Here are two links with good, data science-centric introductions to Docker: https://towardsdatascience.com/how-docker-can-help-you-become-a-more-effective-data-scientist-7fc048ef91d5 https://link.medium.com/G87RxYuQIV
Quickly, how can I test my submission locally?
Install Docker. Clone your repository. Build an image. Run it on a single recording.
Less quickly, how can I test my submission locally? Please give me commands that I can copy and paste.
Here are instructions for testing the Python example code in Linux. You can test the non-Python example code in a Mac, for example, in a similar way. If you have trouble testing your code, then make sure that you can test the example code, which is known to work.
First, create a folder, docker_test, in your home directory. Then, put the example code from GitHub in docker_test/python-classifier-2020-master, some of the training data in docker_test/input_directory and docker_test/input_training_directory, an empty folders for the output of the training code in docker_test/output_training_directory, and empty folder for the classifications in docker_test/output_directory. Finally, build a Docker image and run the example code using the following steps:
Docker
user@computer:~/docker_test$ ls
input_directory  output_directory  python-classifier-2020-master

user@computer:~/docker_test$ ls input_directory/
A0001.hea  A0001.mat  A0002.hea  A0002.mat  A0003.hea ...

user@computer:~/docker_test$ cd python-classifier-2020-master/

user@computer:~/docker_test/python-classifier-2020-master$ docker build -t image .

Sending build context to Docker daemon  30.21kB
[...]
Successfully tagged image:latest

user@computer:~/docker_test/python-classifier-2020-master$ docker run -it -v
~/docker_test/input_training_directory:/physionet/input_training_directory -v
~/docker_test/output_training_directory:/physionet/output_training_directory -v
~/docker_test/input_directory:/physionet/input_directory -v ~/docker_test/output_directory:/physionet/output_directory image bash

root@[...]:/physionet# ls
AUTHORS.txt  Dockerfile LICENSE.txt  README.md driver.py  run_12ECG_classifier.py  get_12ECG_features.py   input_directory  output_directory  requirements.txt

root@[...]:/physionet# python train_model.py input_training_directory/ output_training_directory/

root@[...]:/physionet# python driver.py output_training_directory/ input_directory/ output_directory/

root@[...]:/physionet# exit
Exit

user@computer:~/docker_test$ cd ..

user@computer:~/docker_test$ ls output_directory/
A0001.csv  A0002.csv  A0003.csv  A0004.csv  A0005.csv
How do I install Docker?
Go to https://docs.docker.com/install/ and install the Docker Community Edition. For troubleshooting, see https://docs.docker.com/config/daemon/
Do I have to use your Dockerfile?
No. The only part of the Dockerfile we care about are the three lines marked as ”DO NOT EDIT”. These three lines help ensure that, during the build process of the container, your code is copied into a folder called physionet so that our cloud-based pipelines can find your code and run it. Please do not change those three lines. You are free to change your base image, and at times you should (see next question).
What’s the base image in Docker?
Think of Docker as a series of images, or snapshots of a virtual machine, that are layered on top of each other. For example, our image may built on top of a very lightweight Ubuntu operating system with Python 3.7.3 that we get from the official Docker Hub (think of it as a GitHub for Docker). We can then install our requirements (NumPy and SciPy) on it. If you need the latest version of TensorFlow, then search for it on hub.docker.com and edit your file so that the first line of your Dockerfile now reads as: FROM tensorflow. For a specific version, say 1.11, lookup the tags and change it accordingly to FROM tensorflow:1.11.0. We recommend using specific versions for reproducibility.
sklearn or scikit-learn?
The single most common error we noticed in the requirements.txt file for Python submissions was the sklearn package. If your entry uses scikit-learn, then you need to install via pip using the package name scikit-learn instead of sklearn in your requirements.txt file: See here.
xgboost?
For Python, replace python:3.7.3-slim with python:3.7.3-stretch in the first line of your Dockerfile. This image includes additional packages, such as GCC, that xgboost needs. Additionally, include xgboost in your requirements.txt file. Specify the version of xgboost that you are using in your requirements.txt file.
For R, add RUN R -e 'install.packages(“xgboost”)' to your Dockerfile.
Pandas?
Replace python:3.7.3-slim with python:3.7.3-stretch in the first line of your Dockerfile.
Why can’t I install a common Python or R package using Python or R’s package manager?
Some packages have dependencies, such as GCC, that need to be installed. Try replacing python:3.7.3-slim with python:3.7.3-stretch, which includes more packages by default, or installing the dependencies
If the first line of your Dockerfile is FROM python:3.7.3-slim, then you are building a Docker image with the Debian Linux distribution, so you can install GCC and other related libraries that many Python and R packages use by adding the line RUN apt install build-essential to your Dockerfile before installing these packages.
How do I build my image?
git clone <<your repository URL that ends in .git>>
cd <<your repository name>>
ls
You should see a Dockerfile and other relevant files here.
docker build -t <<some image name that must be in lowercase letters>> .
docker images
docker run -it <<image name from above>> bash
This will take you into your container and you should see your code.
What can I do to make sure that my submission is successful?
You can avoid most submission errors with the following steps:
- Do not change the driver script. We will only use the driver scripts (driver.m, driver.py, and driver.R, driver.jl) in the MATLAB, Python, R, and Julia example repositories (https://github.com/physionetchallenges, so any changes that you make will not be used.
- Do build your Docker image. The above FAQ provides advice for common Docker-related issues.
- Do test your Docker code on at least one file from the training dataset.
- Do try to reduce the run time of your code by moving code from the run_12ECG_classifier function to the load_12ECG_model function for repeated tasks. Most submissions run in a couple of hours on the test data.
Why is my entry unsuccessful on your submission system? It works on my computer.
There are several common reasons for unexpected errors:
- You may have changed the driver script. For consistency across submissions from different participants, we will use the driver scripts available on https://github.com/physionetchallenges/.
- You may have unmet dependencies. Note that packages in the requirements.txt file for Python submissions may have dependencies, such as gcc, that pip is unable to install. You can often identify such issues by trying to build a Docker image from your Dockerfile.
- You may have used a specific version of a Python, R, or Julia package on your computer, but you didn’t specify the version of the package in your Dockerfile or your requirements.txt file, so we installed the latest available version of the package. These versions may be incompatible. For example, if you train your data using one version of a machine learning package and we test it with another version of the package, then your entry may fail.
Submission Form
The submission form can be found here: https://forms.gle/PWu87SqN8frh6aKS7
Supported by the National Institute of Biomedical Imaging and Bioengineering (NIBIB) under NIH grant number R01EB030362.
© PhysioNet Challenges. Website content licensed under the Creative Commons Attribution 4.0 International Public License.